Bill Mason said it best, “Portaging is like hitting yourself on the head with a hammer, it feels so good when you stop.”
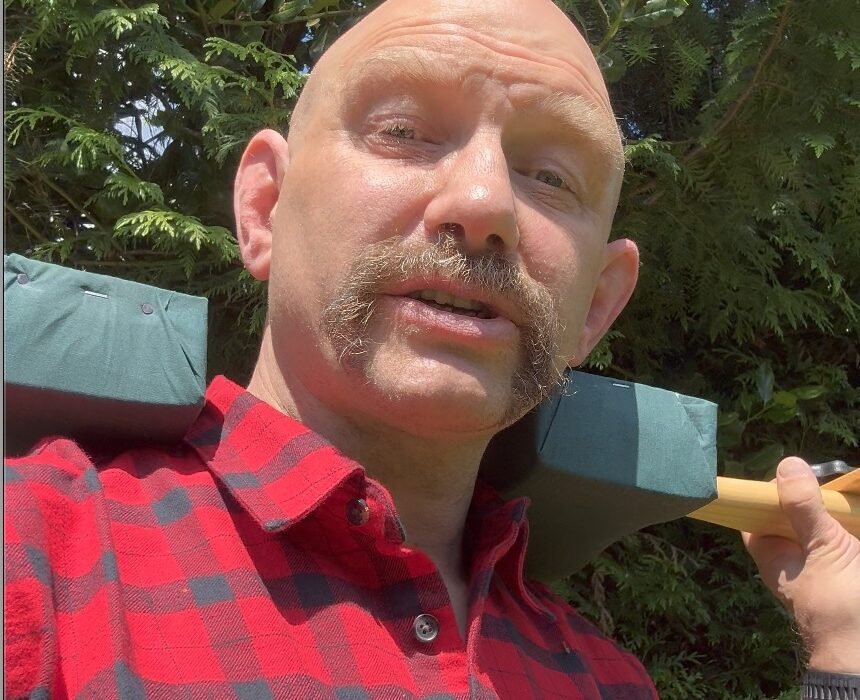
Stumbling across a portage with a heavy canoe on your shoulders, sweat running into your eyes, mosquitoes biting your skin, and a hard carrying yoke grinding into your cervical vertebrae can be exhausting and painful.
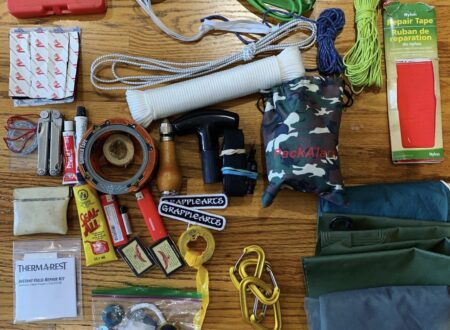
Here’s a step-by-step breakdown of how I built the most comfortable custom padded canoe portaging yoke ever. No more bouncing the damn boat up and down on my cervical vertebrae…
It cushions the load and spreads the weight out over a wider surface. I built my first custom yoke after reading Cliff Jacobson’s great book, Canoeing Wild Rivers 20 years ago.
Since then, I’ve evolved the design a little further to make carrying a boat across a portage even more comfortable.
Here’s a quick video overview of the process, and then I break the steps down below…
Let’s go through the steps for building your own canoeing yoke together…
STEP 1, SELECT YOUR BASE YOKE
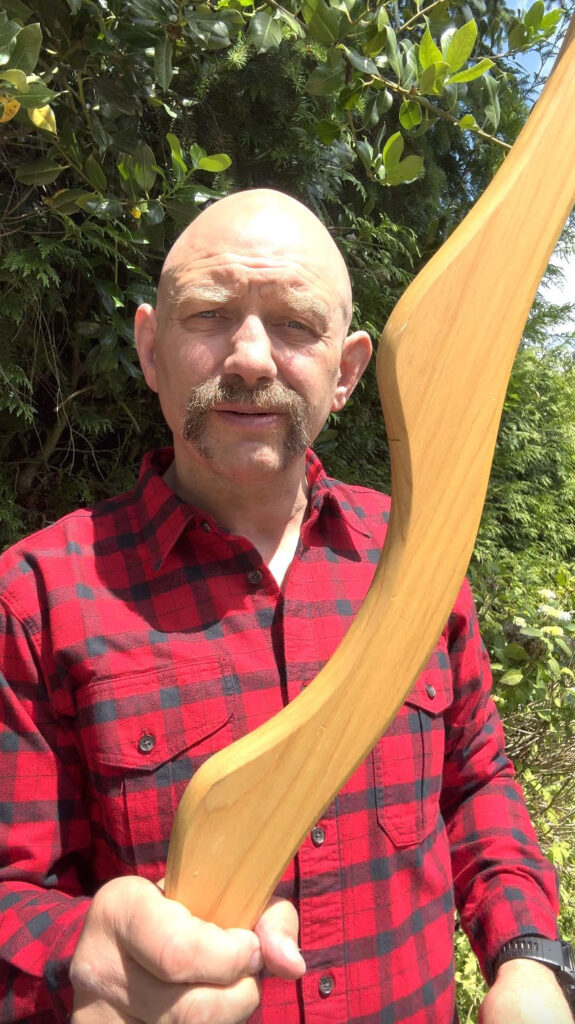
Start with your basic wooden canoe yoke; you can order these from almost any outdoor store. Typically, these are made from ash (a strong and springy wood), are 13/16″ thick, and have a curve in the middle to accommodate your neck.
Make sure your base yoke is flat on both sides. Some designs are scooped to distribute the weight more evenly over your shoulders, but you’re going to need a flat surface to work with for the rest of the build.
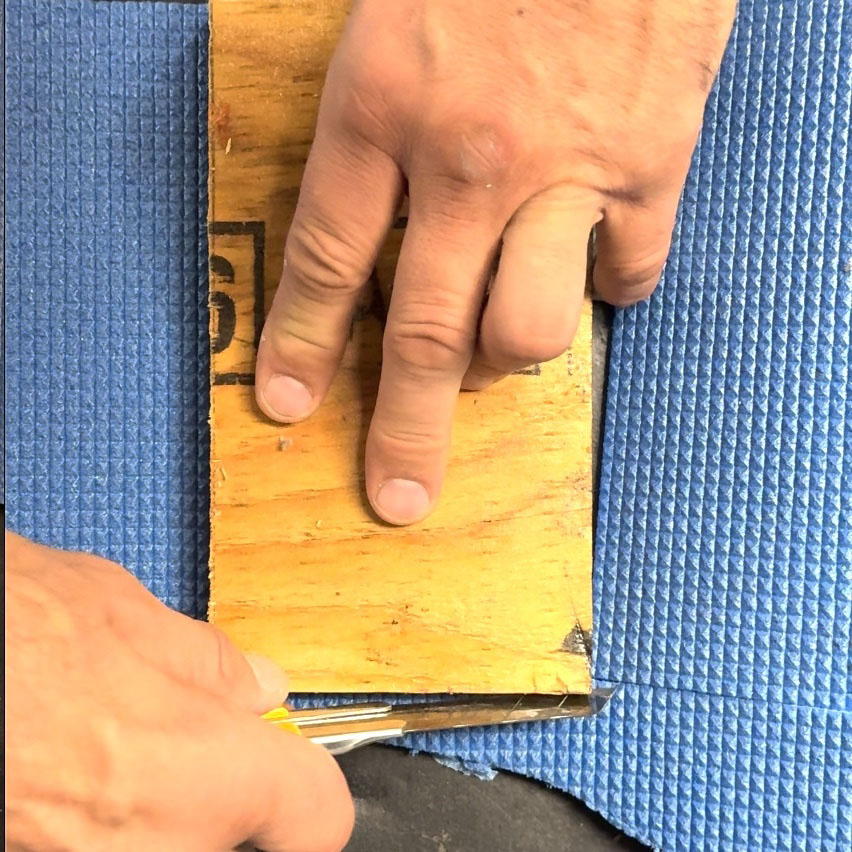
STEP 2, CUT AND PREPARE TWO WOODEN BLOCKS
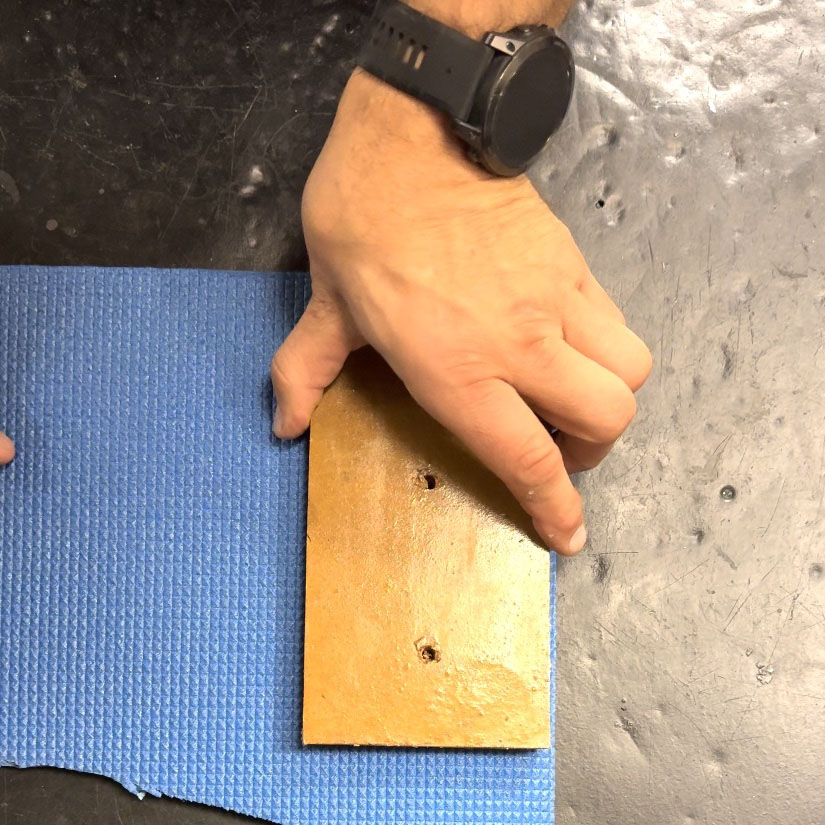
Cut two blocks of wood, 4″ wide and 8″ tall, from 3/4″ thick wood. Drill two or three drainage holes down the middle of the block to let out any water that might accumulate inside the finished pad.
For this build, I used plywood but treated it with several coats of marine-grade varnish (including the inside of the drilled holes) to prevent degradation over time. Some people prefer pine, but I’ve never had a problem with plywood, and it’s less likely to split with an impact.
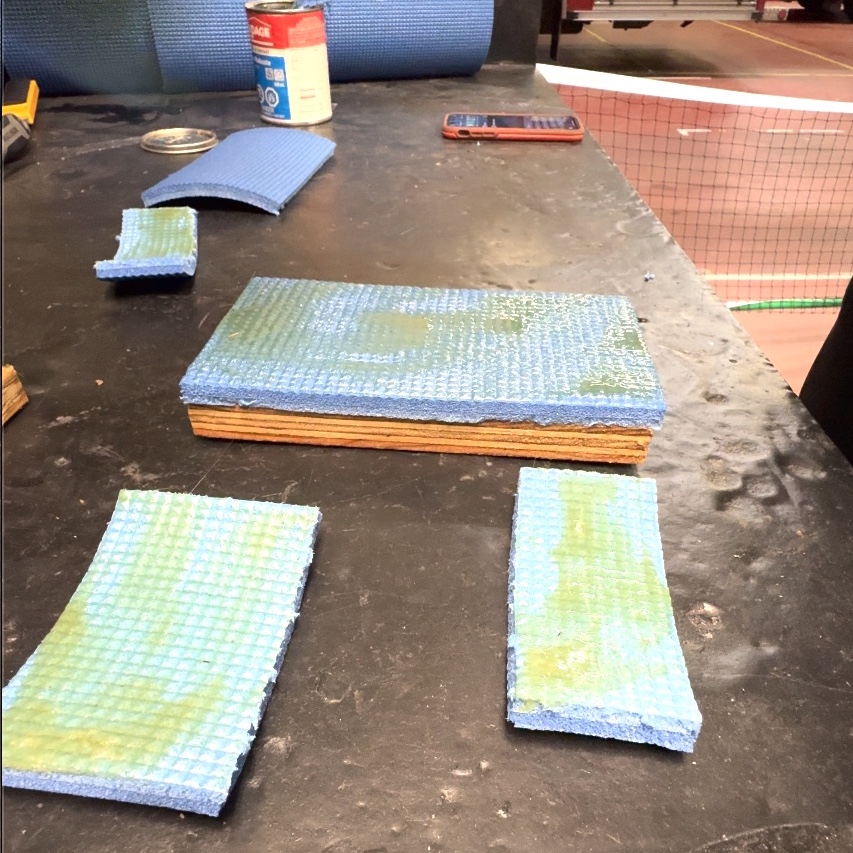
STEP 3, CUT THE FOAM PADDING
Use one of the wooden blocks as a guide, and cut out eight rectangles of closed-cell foam.
I recycled an old 1/2″ thick Ensolite camping mattress for the padding material. It’s durable so long as it’s protected from the sun and abrasion with a cloth cover (see the steps below); some of the pads built using this foam have lasted 20+ years.
Don’t use any more absorbent open-cell foams; they might be more comfortable but will retain water and take forever to dry out after a rain or a capsize. Also make sure to use a relatively flat foam pad, not the egg-carton design used by lightweight backpackers.
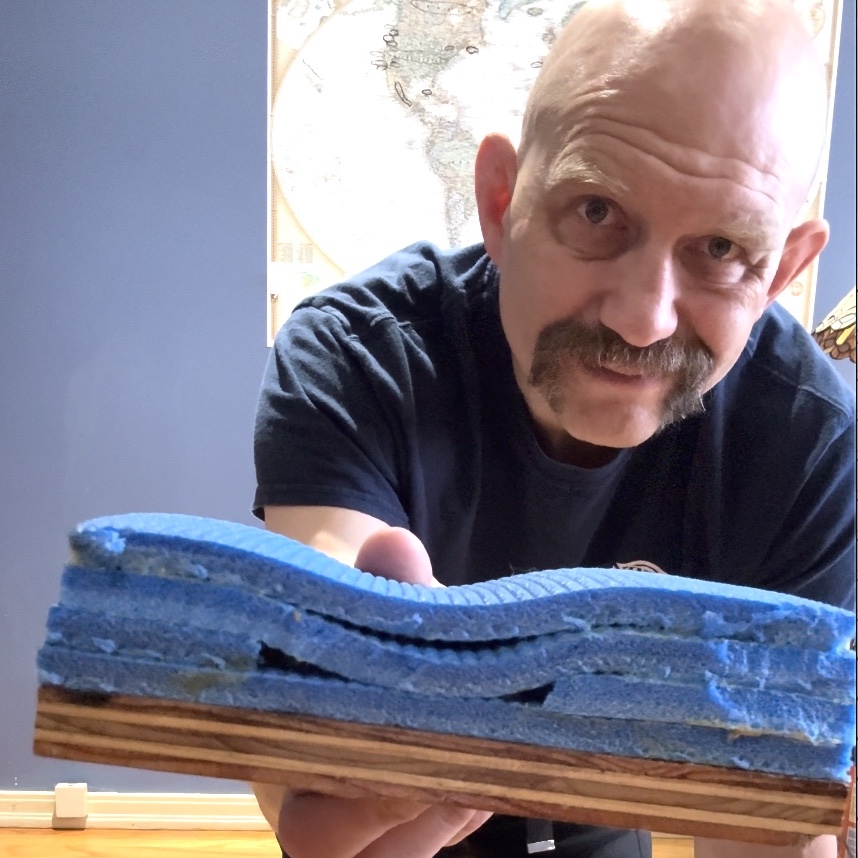
STEP 4, GLUE THE FOAM TO FORM A CURVED PAD
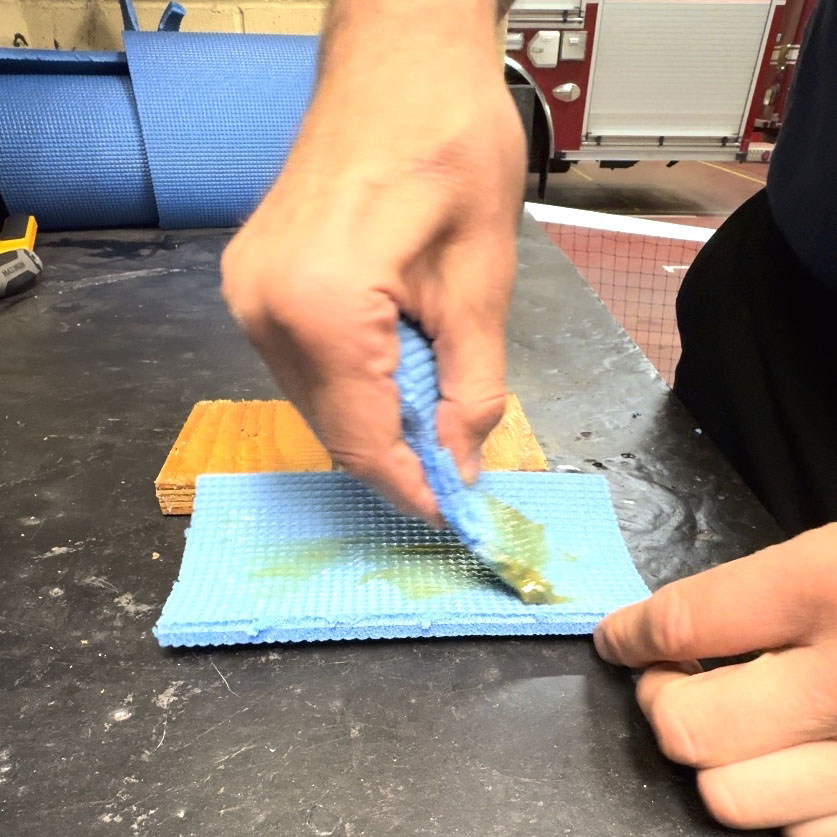
Coat one side of your wooden blocks and one side of a pair of foam pads with contact cement and allow it to dry for 15-20 minutes until it’s tacky to the touch and still glossy to look at. Then stick the first layer of foam to your wooden blocks.
Then cut a 3″ gap in the next pad. You could do this right in the middle (leaving you with two smaller pads that are each 2.5″ wide) or offset it slightly as I did in the pictures above, resulting in a 3″ wide strip and a 2″ wide strip. This will shape the pad into a shoulder-conforming curve and increase overall comfort.
Glue the shorter strips to either side of the pad below, then glue and additional one or two layers above those shorter strips to create a curved pad as in the final picture above. I’ve always gone with four layers of foam for a 2″ pad, but you might be able to get away with one less layer; try it out and let me know how it worked.
STEP 5, ENCASE THE PAD IN NYLON CLOTH

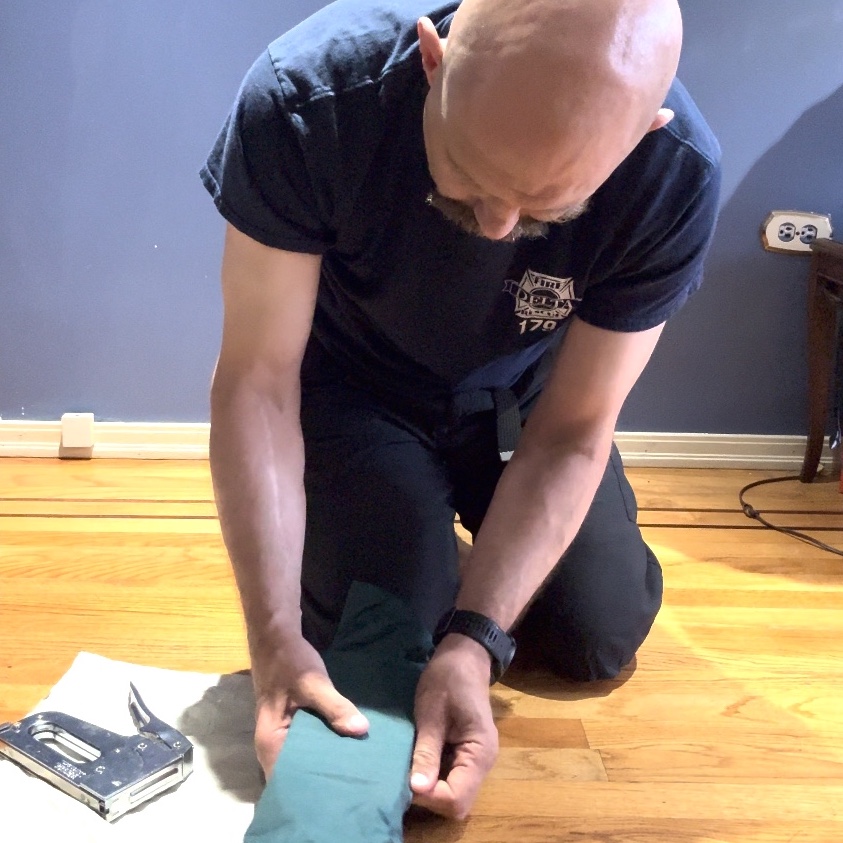
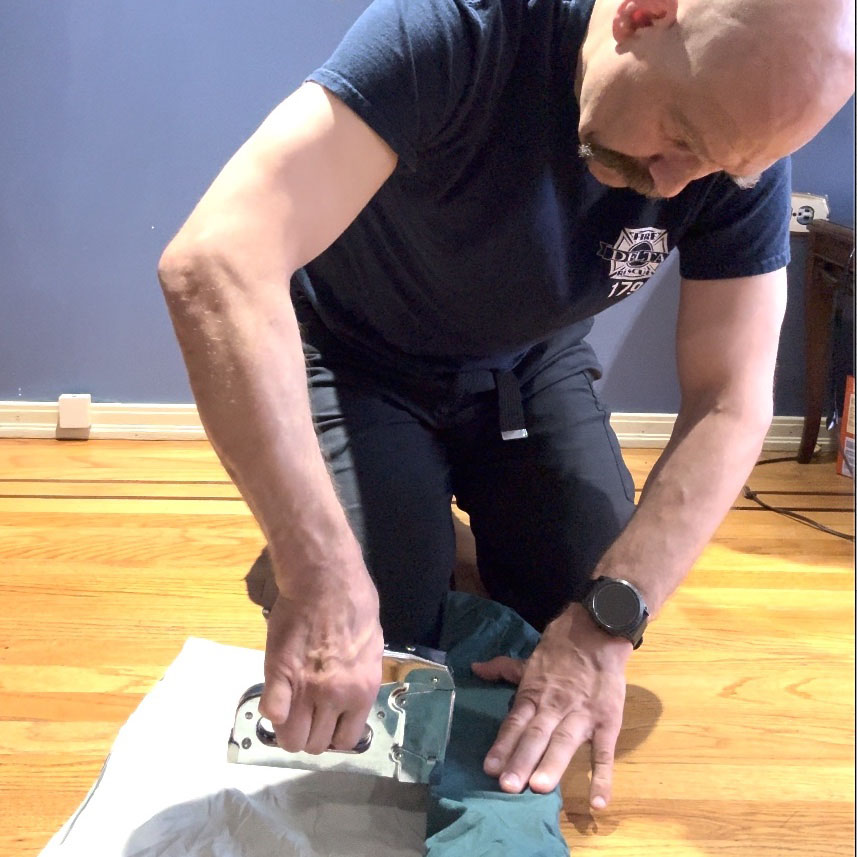
Now it’s time to wrap your pad in nylon cloth to prevent abrasion and sun damage to your foam. You’ve put in a lot of work to get here, so don’t use a light cloth that could rip.
Wrap your block in the cloth like a Christmas present, except use heavy gauge construction staples to hold everything together instead of tape. After folding down all the material, stapling it down, and tamping down any protruding staples I then sealed the edges of the material with Gorilla Tape.
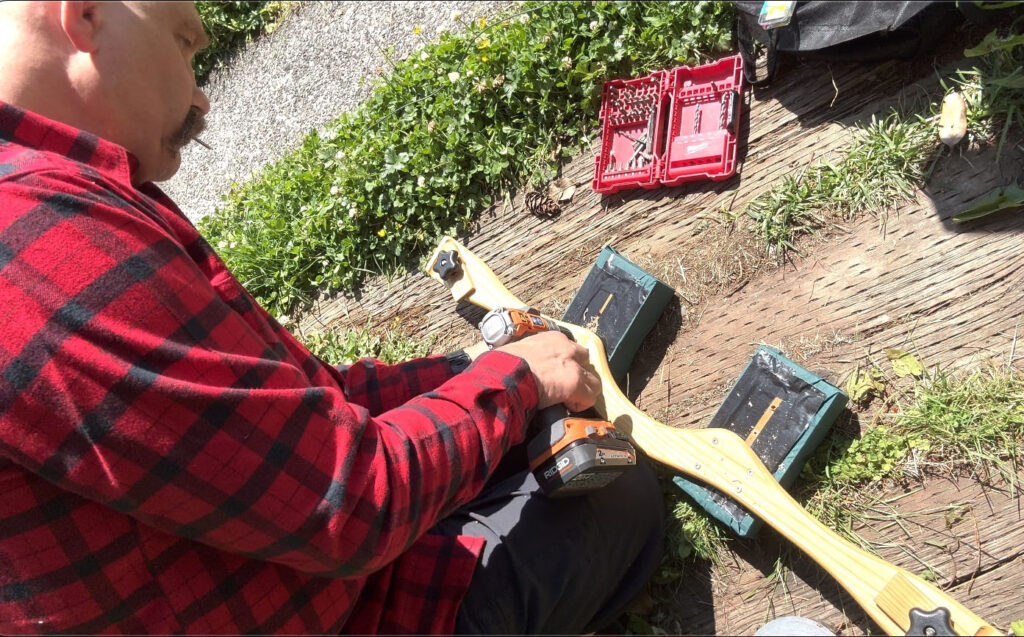
STEP 6, MOUNT THE BLOCKS TO THE YOKE
Some people prefer to have adjustable pads that can be moved in and out depending on the size of the person carrying the boat. The rely on clamps, bolts, nuts and washers – you can find those systems by Googling “adjustable pads for canoe yokes“, and you can probably reverse-engineer them if you’re good at metalwork and/or assembling Lego sets.
Since I was building this particular yoke for use in a solo trip (the 2024 Lost in the Barrens expedition), I decided to permanently affix the pads to the yoke and have fewer things to lose on the tundra.
I mounted the pads just under 8 ” apart to accommodate my fairly large head and shoulders, but most people will probably find the 7 1/4″ to 7 1/2″ distance more comfortable. Temporarily tape the pads to the yoke and try out different spacings if you’re unsure before drilling and screwing.
I attached each pad to the yoke with four 1.5″ stainless steel screws into pre-drilled holes. Since the padding was intentionally asymmetrical (as you can see in the last photo of step 4), I put the narrower padding bump close to the yoke, moving the yoke more over my shoulders and decreasing the torque on the entire system.
HAPPY PORTAGING TRAILS TO YOU
Install the yoke in your boat, head out on your next trip, and arrive at your next portage with a little less dread. This design is SO much better than crushing your neck and shoulders with a conventional hardwood or aluminium yoke!
And since you’re here, could you have a quick look at something for me?
CHECK OUT MY NEW BOOK, PERSEVERANCE, LIFE AND DEATH IN THE SUBARCTIC!
Perseverance, Life and Death in the Subarctic, is the story of my 42-day solo expedition across the Canadian Subarctic after coming back from the brink of death. On this trip, I encountered bears, storms, forest fires, and raging rapids, and had to find new ways to unlock new levels of endurance and tenacity.
I’ve been told it’s a great adventure story, has lots of useful tips and tricks for the outdoors, and is an inspiring read as well. I’d be honoured if you check it out at the bookstore of your choice or at the links below…
Thank you, and good luck with all your own adventures,
Stephan Kesting